
Table of Contents
- What You'll Need Before Starting
- Pet Camera Placement Tips for Optimal Monitoring
- How to Connect a Pet Camera to Wi-Fi
- How to Connect a Pet Camera to Your Phone
- Powering On and Testing Your Smart Pet Camera Setup
- Pet Camera Safety and Privacy Considerations
- Common Setup Mistakes to Avoid
- Frequently Asked Questions
Last Updated: October 10, 2026
What You'll Need Before Starting
Before you unbox your device, gather these essentials for how to set up a smart pet camera: a power outlet near the camera location, a smartphone or tablet with internet access, your Wi-Fi network name and password, and a stable surface or wall mount.
Here's what to have ready:
- Power outlet within reach of your camera location
- Wi-Fi network name and password
- Smartphone or tablet (iOS or Android)
- Stable surface or wall mount for your camera
- Optional: extension cord if outlets are far from your desired camera spot
Download the camera's companion app before starting, this saves time during setup.
Pet Camera Placement Tips for Optimal Monitoring
Camera placement determines monitoring quality. The right location shows exactly what your pet does while you're away.
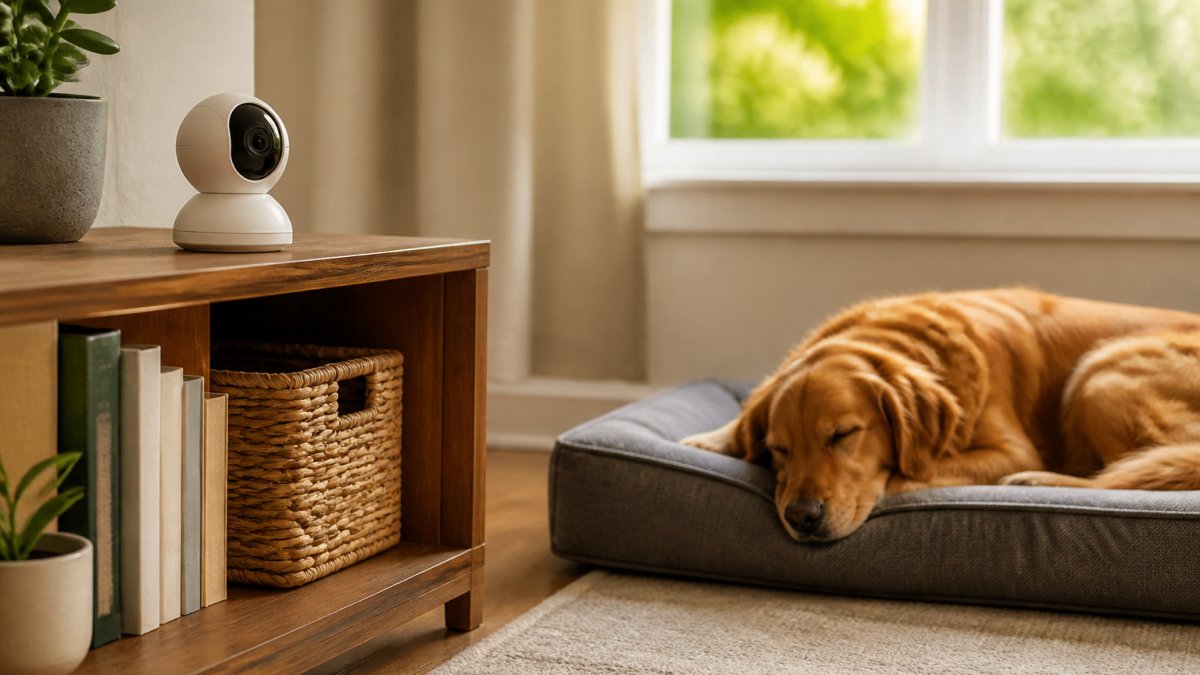
Best locations for different pet types
For dogs, place the camera on a low shelf at eye level with their favorite resting spots. For cats, mount it higher to overlook perches and ground-level play areas. For small pets like rabbits or guinea pigs, position it at their level, roughly 2-3 feet away.
Avoiding glare and obstructions
Avoid direct sunlight, which creates glare. Keep the camera away from obstacles, furniture, curtains, and reflective surfaces like mirrors. Test your live feed before leaving your pet alone to ensure clear visibility.
How to Connect a Pet Camera to Wi-Fi
Your camera needs Wi-Fi to send video to your phone. This connection is essential to the entire system.
Checking Wi-Fi compatibility and signal strength
Most smart pet cameras require 2.4 GHz Wi-Fi (not 5 GHz, which has shorter range). Log into your router's admin panel and confirm the 2.4 GHz band is enabled. If only 5 GHz is active, enable 2.4 GHz before proceeding.
Test signal strength at the camera location, you need at least three bars. Weak signals cause buffering and disconnections. If signal is weak, move your router closer, use a Wi-Fi extender, or choose a different location.
Router settings and network preparation
Log into your router's admin panel and confirm WPA2 or WPA3 security is enabled. Write down your exact Wi-Fi network name and password (capitalization matters). Connect the camera to your main network, not a guest network. Check for firmware updates and install if available. If your router uses MAC filtering, add your camera's MAC address to the allowed list.
Common Wi-Fi connection failures and fixes
If your camera fails to connect: (1) Verify you entered your exact Wi-Fi password with correct capitalization; (2) If your router broadcasts both 2.4 GHz and 5 GHz with the same name, temporarily rename the 5 GHz network so the camera connects to 2.4 GHz only; (3) Move the camera closer to your router to test signal strength, then relocate after pairing; (4) Check your router's advanced settings for client isolation, which blocks device communication; (5) Update the camera firmware if it pairs but immediately disconnects.
How to Connect a Pet Camera to Your Phone
This is where your camera comes to life. The app is your window into your pet's world. Getting the app and camera talking takes just a few steps.
Downloading the app and creating your account
Download the camera manufacturer's app from your phone's app store. Create an account with a strong, unique password and write it down. Allow the app permissions for camera, Wi-Fi, and notifications.
Pairing your camera with the app
Select your camera model and enter your Wi-Fi network name and password (double-check for accuracy). Wait 30-60 seconds for the app to find your camera. Once paired, you should see a live video feed immediately. If not, re-enter your password.
Powering On and Testing Your Smart Pet Camera Setup
Verify that every feature works before relying on the camera to monitor your pet, this is the final step in how to set up a smart pet camera. A thorough test takes 10-15 minutes and prevents surprises when you're away.
Adjusting camera angle and field of view
Use the app to adjust the camera's position, pan, and tilt to focus on where your pet spends the most time. Test zoom features to verify clarity at different levels. Note which zoom level works best for your needs.
Complete post-setup testing checklist
Before you leave your pet alone with the camera, run through this checklist to confirm everything works:
Live video feed quality: Open the live feed in the app and watch for at least three minutes. Look for smooth playback without stuttering, freezing, or lag. Move around the room and watch how the camera tracks motion. If video stutters or freezes, your Wi-Fi signal is weak, move the camera closer to your router or restart your router by unplugging it for 30 seconds and plugging it back in.
Audio quality: Listen to the audio from the camera's microphone. Can you hear your pet clearly? Is there background noise or distortion? Test the two-way audio feature by speaking into your phone and listening for your voice through the camera's speaker.
Night vision and low-light performance: Turn off the lights in the room and test night vision mode. Most cameras switch to infrared automatically in darkness. Verify that you can still see your pet clearly in low light.
Motion detection and alerts: If your camera has motion detection, enable it and test it. Walk in front of the camera and confirm that the app sends you a notification. Check your phone's notification settings to ensure alerts aren't being silenced or delayed.
Remote access from outside your home network: This is critical. Leave your home Wi-Fi range (go outside or to a nearby location with different internet) and open the live feed in the app. Confirm that you can still see video and hear audio.
Recording and playback (if applicable): If your camera records video, test the playback feature. Confirm that you can view recorded clips in the app. Check how long recordings are stored (24 hours, 7 days, or longer) and whether cloud storage is enabled.
Ongoing maintenance and updates
Your camera requires periodic maintenance to stay secure and perform reliably.
Firmware updates: Check the app settings for firmware update options at least once per month. Manufacturers release updates that improve performance, add features, and patch security vulnerabilities. Enable automatic updates if the app offers this option. If you must update manually, do so when you're home and can verify the camera reconnects properly afterward.
Lens cleaning: Dust, pet hair, and fingerprints accumulate on the camera lens over time, degrading image quality. Clean the lens gently with a soft, dry microfiber cloth every two weeks. Avoid harsh chemicals or abrasive materials that can scratch the lens coating.
Password and security review: Every three months, review your camera's security settings. Confirm that two-factor authentication is enabled, that your password is still unique and strong, and that no unauthorized devices have access to your camera. If you suspect unauthorized access, change your password immediately and review the app's login history if available.
Wi-Fi signal monitoring: If your video quality degrades over time, check your Wi-Fi signal strength again. Interference from other devices, changes to your router placement, or new obstacles can weaken the signal. If signal strength drops below three bars, move the camera closer to your router or consider a Wi-Fi extender.
Pet Camera Safety and Privacy Considerations
Your camera connects to the internet. This creates security risks you need to address. Protecting your privacy and your pet's safety takes just a few smart steps.
Change your password immediately after setup. Use a unique password you don't use anywhere else. A strong password has uppercase letters, numbers, and symbols. Never share your login details with anyone.
Enable two-factor authentication if the app offers it. This adds an extra security layer. Even if someone gets your password, they can't access your camera without a second verification step.
Check your app's privacy settings. Disable cloud storage if you don't need it. If you use cloud storage, understand what data the company keeps. Some companies delete footage after 24 hours. Others keep it indefinitely.
Position your camera where it respects family privacy. Don't point it at bathrooms or bedrooms. Focus only on common areas where your pet spends time. This protects your family's privacy if anyone gains unauthorized access.
Update your camera's firmware regularly. Manufacturers release updates that fix security holes. Check the app settings for update options. Enable automatic updates if available.
Common Setup Mistakes to Avoid
Most setup problems come from rushing through these steps. Take your time and avoid these pitfalls.
Placing the camera too far from your Wi-Fi router is the number one mistake. Distance weakens signal strength. Your video will buffer constantly. Keep the camera within 30 feet of your router if possible.
Forgetting to write down your Wi-Fi password causes headaches later. The app needs this password to reconnect. Write it down and store it safely before you start setup.
Mounting the camera before testing it wastes time. Always test your live feed and audio before permanently mounting. If something doesn't work, you'll need to adjust the camera position. Testing first saves you from remounting.
Using the wrong Wi-Fi band is common with dual-band routers. Your camera likely needs 2.4GHz, not 5GHz. Check your router settings and make sure the camera connects to the correct band.
Ignoring notification settings creates constant phone alerts. Your phone will buzz every time your pet moves. Adjust these settings after setup. Most apps let you set quiet hours or disable non-essential alerts.
Frequently Asked Questions
Do you need Wi-Fi for a pet camera?
Most smart pet cameras require Wi-Fi to function. However, some models offer local storage or limited offline features. For full remote monitoring and two-way communication, a stable wireless network connection is essential. Check your specific camera's specifications to confirm Wi-Fi requirements before purchasing.
How do I troubleshoot a pet camera that won't connect to Wi-Fi?
Start by restarting both your camera and router. Verify your Wi-Fi network name and password are correct. Ensure your router is within range and supports the required frequency band. Check if firmware updates are available. If problems persist, reset the camera to factory settings and repeat the setup process from the beginning.
What's the best place to put a pet camera in a room?
Position your pet camera on a low shelf or mount it at pet eye level to capture natural behavior. Avoid direct sunlight and windows that create glare. Place it in areas where your pet spends the most time. Ensure an unobstructed view and keep cables secured safely away from pets to prevent chewing or tripping hazards.
How can I make my pet camera more secure and private?
Use a strong, unique password for your account and enable two-factor authentication if available. Change default camera settings and disable features you don't need. Keep the camera's firmware updated regularly. Review app permissions and adjust privacy settings. Use a separate Wi-Fi network for smart home devices if possible, and never share login credentials with others.
Setting up a smart pet camera gives you peace of mind when you're away from home. The process takes less than 30 minutes when you follow these steps carefully. At Trending Now Co., we help pet owners find the trending pet supplies that fit their lifestyle. Our curated selection includes the latest smart pet cameras and monitoring devices. Shop our pet supplies collection to find the perfect camera for your home and get started monitoring your furry friend today.